You can trim audio online by loading a file into a browser tab, dragging the selection across the waveform and exporting the part you keep as MP3 or WAV. The decoding and the cut happen on your own device with FFmpeg compiled to WebAssembly, so nothing is uploaded, no account is required and there is no length limit.
Two things are worth knowing before you start. The cut is re-encoded rather than copied, which is what makes it land exactly on the time you asked for, and the cost is that an MP3 is compressed one more time. The tool opens MP3, WAV, M4A, AAC, OGG, FLAC and Opus files, keeps your original name with a -trimmed suffix, and adds an optional fade of up to five seconds at each end of the clip. The first run downloads an engine of about 30 MB, and the trimmed audio is handed to you as a download.
Trimming is the least glamorous audio edit and the one people need most often. A voice memo rambles before the useful part starts, a podcast recording opens with a cough, a ringtone candidate needs only the chorus, or a screen recording carries a stretch of silence at the end. Desktop editors handle all of that, and they also ask you to install something, learn a timeline and export through a dialog you will have forgotten by next month.
What a browser audio trimmer can do
An online audio trimmer is a waveform editor that lives in a web page rather than in an installed program. When you load a file, the tool decodes it with the browser's own audio decoder and draws the result as a waveform, so the shape of the sound becomes visible: speech sits in dense blocks, music shows repeating peaks, and silence is a flat line. You set where the clip starts and ends, listen to that range, and export it as a new file. Your original stays untouched on disk.
Audio Trimmer
Draw the waveform, drag the region to the part you keep, preview it, then export MP3 or WAV. The audio never leaves your device.
Two things separate this from a typical converter site. The work happens on your machine: the file is read into the tab, the cut is encoded there, and the result is handed back as a download. There is also no queue, no watermark and no sign-up, because there is no server to meter.
The selection is the only thing that gets exported
The highlighted region on the waveform is the clip. Whatever sits between its start and end markers is what lands in the downloaded file, and everything outside them is left out of the output. A fresh file arrives with the whole recording already selected, which is convenient and also a trap: drag one edge and you can export without noticing that the head of the recording has been dropped.
Why the cut lands where you asked
The selected range is decoded and encoded again rather than copied as a block of compressed data. That is deliberate, because copying MP3 frames can only cut on frame boundaries, so a cut requested at 1:24.5 can land a fraction of a second from the target. Re-encoding costs one more generation of loss on an MP3 source and buys an exact cut in return. WAV output sidesteps the question, since uncompressed PCM has no frames to align to.
How to trim an audio file online
The whole job takes four steps, and none of them require an account.
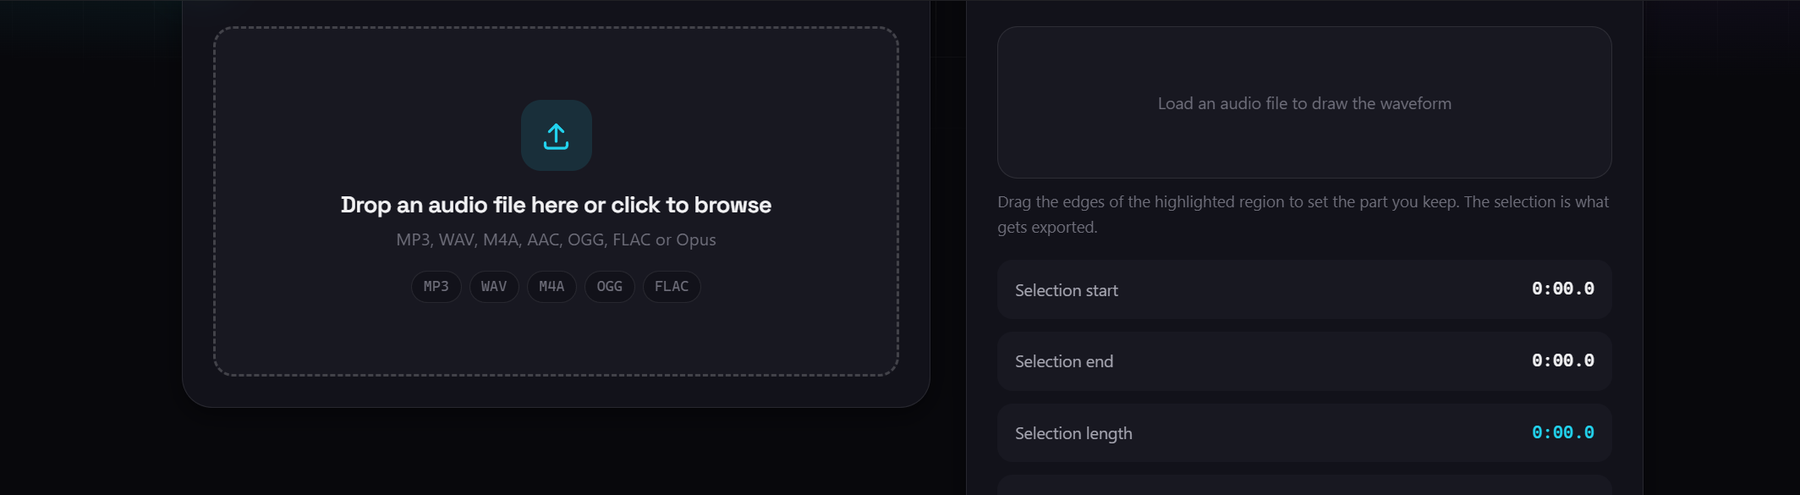
- Add your audio. Drop an MP3, WAV, M4A, AAC, OGG, FLAC or Opus file onto the upload box. The file is read from your disk, decoded locally and drawn as a waveform. Anything that is not audio is refused with a short note instead of being half-processed.
- Set the start and the end. Drag the edges of the highlighted region, or type exact times into the Start time and End time fields using mm:ss.ms, such as 1:24.5 for one minute and 24.5 seconds. Both routes edit the same selection, so the numbers and the waveform never disagree, and the panel reports the selection length next to the total length of the file.
- Choose MP3 or WAV and a fade. MP3 keeps the clip small and plays everywhere; WAV keeps it uncompressed for further editing. If the clip needs soft edges, set the fade slider to anything between 0.1 and 5 seconds.
- Trim audio and download. The result card shows the source size next to the output size, plays the clip back so you can check the cut, and offers the download. The file is named after your original with -trimmed and the new extension, so it never overwrites anything.
Before exporting, use Play selection to hear the range you are about to keep: playback starts at the selection start and stops at the selection end, which is the fastest way to catch a word clipped in half at the front. Stop rewinds to the start, and Reset selection returns the region to the whole file.
MP3 or WAV for the export
The format choice is really a question about what happens to the clip after this page. Both options are produced locally, so the decision is about size and future editing rather than about privacy.
| Output | What it is | Best for | What to watch out for |
|---|---|---|---|
| MP3 | Lossy audio encoded at 192 kbps | Sharing, ringtones, podcast clips, chat uploads | Adds one generation of loss to a source that is already lossy |
| WAV | Uncompressed PCM | Editing, sampling, video timelines, archiving a work file | Much larger than the MP3 for the same clip, so a poor fit for email |
MP3 is the default for a reason. It is small, every phone and player opens it, and one extra encode at 192 kbps is hard to hear on speech and most music. Pick it whenever the clip is finished and its only remaining job is to be listened to.
WAV is the better answer while the clip is still raw material. Uncompressed PCM adds no further loss, so it survives an editor, a sampler or a video timeline without losing another generation of detail. The same property makes it a bad fit for sending anywhere, because the files are much larger. Keep the working copy in WAV, then export MP3 once, at the end.
Fade in and out
A hard cut on a music track or a loud room tone often leaves an audible click at the first and last sample of the clip. The fade slider fixes that. It runs from 0 to 5 seconds in steps of 0.1, and a value of 0 shows as Off, which means the clip is exported exactly as selected.
One slider controls both ends: the clip fades up from silence at the start and back down to silence at the end by the same amount. The fade is capped at half the length of the selection, so the two ramps cannot overlap in the middle and a short clip still exports cleanly. The fade is applied during the export, so the waveform you see is the unfaded source; check the player on the result card before you download.
What this trimmer cannot do
The limits are worth reading before you commit, because in these cases a desktop tool is genuinely the right answer.
- The cut is re-encoded, not lossless. The selection goes through an encoder to land on your exact timing. An MP3 source is therefore compressed one more time, and a WAV source is converted to PCM and written out again. If you need a byte-exact lossless cut, this is not it.
- WAV output is much larger. Uncompressed PCM stores every sample in full, so a WAV clip is far bigger than the MP3 version of the same range. Use WAV for editing material, not for attaching to an email.
- The first run downloads about 30 MB. That is the FFmpeg engine, which is cached afterwards and then works offline. On a slow connection the first click sits at the loading stage for a while.
- Long recordings depend on device memory. There is no hard duration limit written into the tool, but the engine runs in browser memory, so a very long file can fail on a device with little free memory.
- Cut audio is gone from the output. The tool never edits your original, but it also has no undo for the exported clip. Keep the source file until you are sure the cut is right.
- One continuous clip per run. The selection is a single start and end, so splitting a recording into several pieces means several exports. There is no multi-region batch export.
- No mixing, no cleanup, no speed change. There is no multi-track mixing, no automatic silence removal, no loudness normalisation and no tempo or pitch change. It cuts, fades and encodes, and that is the whole feature list.
Trimming inside a longer audio workflow
Trimming is usually one step of three rather than the whole task. A common route is to pull an audio track out of a video first, trim it down to the part that matters, and then convert it to whatever format the destination expects.
The video to MP3 tool extracts the audio track from a video file locally, which is the usual starting point when the sound you want is inside a screen recording or a clip. From there the audio trimmer cuts the recording to length, and the audio converter changes the container if the destination wants something other than MP3 or WAV. All three run in the browser, so a file moves through them without ever being uploaded.
For recordings you make yourself, the screen recorder captures a tab or a screen with system audio straight into the same trimming step. Recording long and cutting afterwards is usually faster than stopping a recording at exactly the right moment.
Video to MP3
Extract the audio track from a video in your browser, then trim it down to the part you actually need.
Why trimming locally matters
Most audio on a personal machine is not meant to be public. Voice memos carry family conversations, work recordings carry a customer call, and screen recordings carry whatever was on screen when the capture started. Uploading that to a converter site means trusting a retention policy you have not read.
Running the trim in the tab removes that question. The audio is read from local storage, decoded and encoded locally, and the only network traffic is the page itself plus the one-time engine download. You can verify it rather than take it on faith: open the browser developer tools, switch to the network panel and trim a clip. Nothing carrying the audio appears.